You can usually cut an image’s file size by half or more without any visible loss. To do it, you resize the image to the size it will actually be displayed at, pick the right format, and use sensible compression settings. This guide shows how to compress images without losing quality, using any tool, including our free image compressor and converter.
Why are your image files so big?
Most oversized images come from cameras and phones. A modern phone photo is often 4,000 pixels wide or more, while a blog post or product page rarely displays an image wider than 1,200 to 1,600 pixels. Every extra pixel adds weight to the file but adds nothing a visitor can see.
The second reason is format. Screenshots saved as JPEG look blurry around text, and photos saved as PNG are often several times larger than they need to be. Choosing the right format fixes a big part of the problem before you change a single quality setting.
Lossy vs lossless compression: what is the difference?
Lossless compression makes a file smaller without changing a single pixel. It works well for screenshots, logos and graphics with flat colors, but it saves less space on photos.
Lossy compression removes detail that the eye is unlikely to notice. Used at a sensible setting, it can make photos much smaller with no visible difference. Pushed too far, it causes blocky areas, color banding and halos around edges. Compressing images without losing quality really means using lossy compression for photos at a level where the loss stays invisible.
How to compress images without losing quality, step by step
- Keep the original. Always work on a copy. Every lossy save throws detail away, so compress from the original file, never from an already compressed version.
- Resize first. Scale the image to the largest size it will be shown at. For most websites that is 1,200 to 1,600 pixels wide. This step alone often removes most of the file size.
- Pick the format. Use WebP or JPEG for photos, PNG or lossless WebP for screenshots and graphics with sharp text. Our comparison of WebP vs AVIF vs JPEG vs PNG explains when to use each.
- Set the quality. For lossy formats, start around 80 on a 0 to 100 scale, then lower it step by step while comparing with the original at 100% zoom. Stop as soon as you can see a difference.
- Remove metadata. Photos can carry camera details and even GPS location. Stripping metadata makes the file a little smaller and protects your privacy.
- Compare and export. Check faces, text and smooth gradients like skies, where artifacts show first. If they look clean, export.
How much smaller can WebP make your images?
Switching format is often the easiest win. According to Google’s WebP documentation, lossless WebP images are 26% smaller than PNGs, and lossy WebP images are 25 to 34% smaller than comparable JPEG images at the same visual quality. WebP works in all major current browsers, including Chrome, Safari, Firefox and Edge.
That means a site that converts its photos from JPEG to WebP can save a quarter or more of its image weight with no visible change, on top of whatever resizing already saved.
Which settings should you use for common jobs?
| Use | Format | Size | Starting quality |
|---|---|---|---|
| Blog or article photo | WebP (or JPEG) | 1,200 to 1,600 px wide | 75 to 82 |
| Product photo | WebP (or JPEG) | Your store’s zoom size | 80 to 85 |
| Screenshot with text | PNG or lossless WebP | Actual display size | Lossless |
| Logo or icon | SVG, PNG or lossless WebP | Display size, or vector | Lossless |
| Email attachment photo | JPEG | 1,600 px on the long side | 75 to 80 |
These are starting points, not rules. Different tools use different quality scales, so always judge the result with your own eyes.
Which mistakes make compressed images look bad?
The most common mistake is compressing the same image again and again. Each lossy save adds new artifacts, so edit and compress once, from the original.
Other mistakes are saving screenshots as low-quality JPEGs, which makes text fuzzy, and resizing a small image up to a larger size, which only adds blur. Finally, avoid judging quality on a zoomed-out thumbnail. Look at 100% zoom, because that is where compression problems appear.
Can you compress images online without uploading them?
Yes. Some online tools process images inside your browser, so the files never leave your device. That is the safer choice for personal photos or client work. Before you use any online compressor, check whether it uploads your files to a server and how long it keeps them.
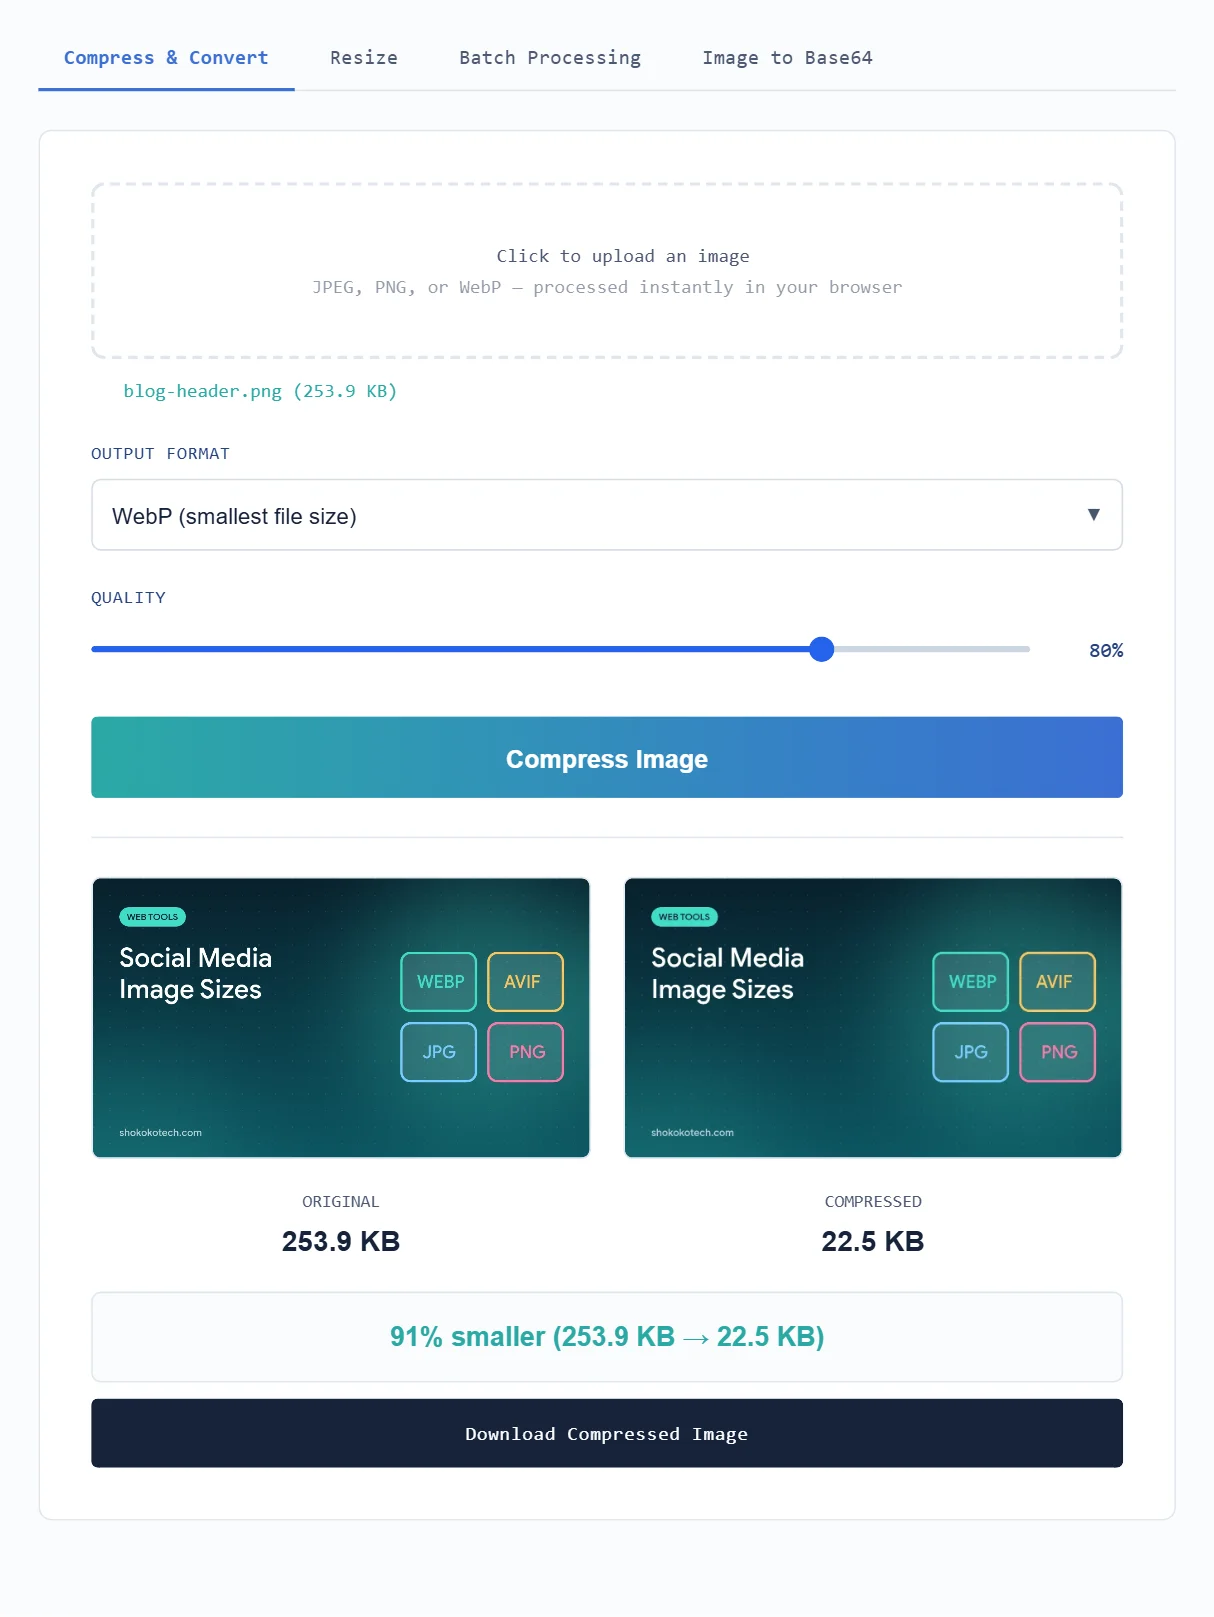
Our free image toolkit lets you compress, convert and resize JPG, PNG and WebP files from one page, which covers the steps in this guide.
Smaller images also help your website load faster; see how to speed up WordPress and pass Core Web Vitals. Before you share a striking image, you can also check whether it is AI-generated.
Creating images with AI? Our guide to the best AI image generators explains which tools to use.
Posting on social media? Resize to the right dimensions first with our social media image sizes guide, then compress.
Compressing images is one of the easiest ways to save cloud space. See more tips in how to free up Google Drive and iCloud storage.
Working with PDFs? Turn pages into images with our PDF to JPG converter, then compress them here.
Still too big after compressing? Here is how to send large files for free.
Frequently asked questions
Does compressing an image reduce its quality?
Lossless compression never changes the image. Lossy compression does remove detail, but at a sensible quality setting the change is invisible to most viewers.
What is the best image size for a website?
Use the largest size the image will actually be displayed at, which for most layouts is 1,200 to 1,600 pixels wide. Larger files only slow the page down.
Should I use WebP or JPEG?
Use WebP when your website or platform supports it, because it gives smaller files at the same quality. Keep JPEG for email and for places that do not accept WebP.
What is the fastest way to start?
Take one large image, resize it to the width your page uses, convert it to WebP at a quality of about 80 and compare it with the original. Once you are happy with the result, use the same settings for the rest of your images.
Sources
This article is based on the official documentation and reporting listed in the sources above, checked on October 17, 2026. Features and prices change, so confirm details on the official pages before you buy. ShokokoTech does not accept payment for coverage. Read our editorial policy.